在建分類選單時,我們在分類連結中加入了分類的網址參數,因此在顯示商品陳列時,可以依據此一分類參數來決定要顯示的分類文字及商品。
先判斷是否有網址參數
type存在,如果存在,則依據type的值來決定分類文字及撈取的商品資料
./front/main.php1
2
3
4
5
6
7
8
9
10
11
12
13
14
15
16
17
18
19
20
21
22
23
24
25/**
* 根據網址有無type來決定要顯示的商品分類
*/
//預設type=0,顯示全部商品,否則指定變數$type為商品分類id
$type=$_GET['type']??0 ;
if($type!=0){
$t=$Type->find($type);
//判斷此分類是否為大分類
if($t['big_id']==0){
//取出所有大分類的商品
$goods=$Goods->all(['big'=>$type,'sh'=>1]);
//將大分類名稱放入變數$nav
$nav=$t['name'];
}else{
//取出所有中分類的商品
$goods=$Goods->all(['mid'=>$type,'sh'=>1]);
//將大分類與中分類名稱放入變數$nav
$nav=$Type->find($t['big_id'])['name']." > ".$t['name'];
}
}else{
//取出全部商品
$goods=$Goods->all(['sh'=>1]);
//將全部商品字串放入變數$nav
$nav="全部商品";
}在
./front/main.php顯示分類文字1
<h2>$nav;</h2>
先建立商品顯示的格式,這裏我們使用div來做排版會比題目使用表格來得快一些,美化可以晚點再做。
1
2
3
4
5
6
7
8
9
10
11
12
<div class='all'>
<div class='pp ct'>
<img src="./img/" style=" width:150px;height:100px">
</div>
<div>
<div class='tt ct'></div>
<div class='pp'>價錢:</div>
<div class='pp'>規格:</div>
<div class='pp'>簡介:</div>
</div>
</div>時間足夠的話可以加上css來簡單美化一下畫面
1
2
3
4
5
6
7
8
9
10
11
12
13
14
15
16
17
18.all{
display:flex;
}
.all>div:nth-child(1){
width:35%;
padding:15px;
margin:1px;
}
.all>div:nth-child(2){
width:65%;
display:flex;
flex-wrap:wrap;
}
.all>div:nth-child(2) div{
width:100%;
margin:1px;
padding:3px 5px;
}接著按前面取得的商品資料,以迴圈方式將商品陳列在畫面上
1
2
3
4
5
6
7
8
9
10
11
12
13
14
15
foreach($goods as $g){
<div class='all'>
<div class='pp ct'>
<img src="./img/<?=$g['img'];?>" style=" width:150px;height:100px">
</div>
<div>
<div class='tt ct'><?=$g['name'];?></div>
<div class='pp'>價錢:<?=$g['price'];?></div>
<div class='pp'>規格:<?=$g['spec'];?></div>
<div class='pp'>簡介:<?=mb_substr($g['intro'],0,20);?>...</div>
</div>
</div>
<?php } ?>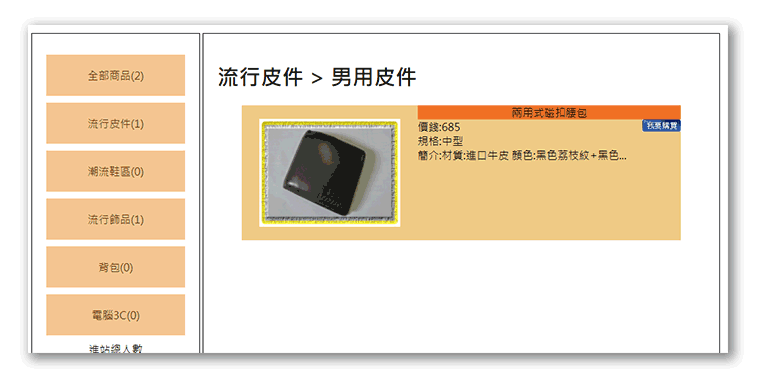
在
main.php中要注意的是在使用者按下我要購買按鈕時,我們除了要把使用者導向購物車頁面外,也同時要把商品的id及數量一起帶過去。1
2
3
4
5
6
7<div class='pp'>
價錢:<?=$g['price'];?>
<!--使用網址參數將商品id及數量帶到購物車去-->
<a href="?do=buycart&id=<?=$g['id'];?>&qt=1" style="float:right">
<img src="./icon/0402.jpg" alt="">
</a>
</div>商品圖片增加連結將頁面導到商品詳細內容頁面:
1
2
3
4
5<div class='pp ct'>
<a href="?do=intro&id=<?=$g['id'];?>">
<img src="./img/<?=$g['img'];?>" style=" width:150px;height:100px">
</a>
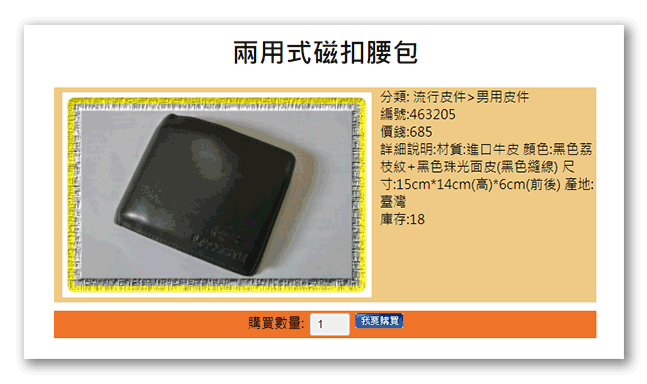
</div>建立
./front/intro.php檔案,並且撰寫商品詳細內容的頁面。1
2
3
4
5
6
7
8
9
10
11
12
13
14
15
16
17
18
19
20
21
22
23
24
25
26
27
28
29
30
31
32
33
34
35
36
37
38
39
40
41
42
43
44
45
46
47
//取得商品資料
$goods=$Goods->find($_GET['id']);
//取得商品分類文字
$types=$Type->find($goods['big'])['name']." > ".$Type->find($goods['mid'])['name'];
<style>
/**
* > 代表子元素中第一層的div
* 只有第一層的div會被設定樣式
*/
.all>div:nth-child(1){
width:60%;
padding:5px;
margin:1px;
}
.all>div:nth-child(2){
width:40%;
display:flex;
flex-wrap:wrap;
}
.all>div:nth-child(2) div{
width:100%;
margin:1px;
padding:3px 5px;
}
</style>
<h2 class="ct"><?=$goods['name'];?></h2>
<div class="all" style="display:flex">
<div class='pp'>
<img src="./img/<?=$goods['img'];?>" style="width:100%;height:250px">
</div>
<div>
<div class="pp">分類:<?=$types;?></div>
<div class="pp">編號:<?=$goods['no'];?></div>
<div class="pp">價格:<?=$goods['price'];?></div>
<div class="pp">詳細說明:<?=nl2br($goods['intro']);?></div>
<div class="pp">庫存量:<?=$goods['stock'];?></div>
</div>
</div>
<div class="ct all tt">
購買數量:
<input type="number" value='1' style="width:30px;">
<a href="Javascript:buycart(<?=$goods['id'];?>)">
<img src="./icon/0402.jpg" alt="">
</a>
</div>
- 在詳細內容頁面中,要注意的是我們採用 javascript 的方式來做商品資料的傳送,函式中把商品
id傳出去,這在使用者按下我要購買後會觸發buycart()函式,並取得使用者選購的數量,然後把商品 id及商品數量帶入location語法中,導向購物車頁面。1
2
3
4
5
6
7//購物車的函式
function buycart(id){
//取得購買數量
let qt=$("#qt").val();
//將商品id與購買數量送到購物車中
location.href=`?do=buycart&id=${id}&qt=${qt}`;
}