預告片動畫算是有難度的一個製作項目,這邊採用做法是依照示意給出的範例來製作,實際檢定時,可以視時間減少一些功能或檢查的工作,讓解題速度可以快一些,在撰寫javascript的動畫相關功能時,要稍微注意js動畫執行上的一些小問題,確保動畫能依照預期的效果來進行。
- 原版型中所附的s2.css內容並不實用,加上我們不清楚原本的js怎麼寫的,因此我們這裹自己寫全新的css內容供js控制之用,有些美觀用的css設定可以再做簡化或忽略,爭取解題時間。
- 同時我們採用jquery提供的幾個內建動畫來製作轉場效果,會比使用原生javascript或是css動畫來得快速
- 這邊我們利用了不少css的
flexbox原理來設定物件的位置和排列,相關的css應用方式,請同學們要多多練習和熟悉
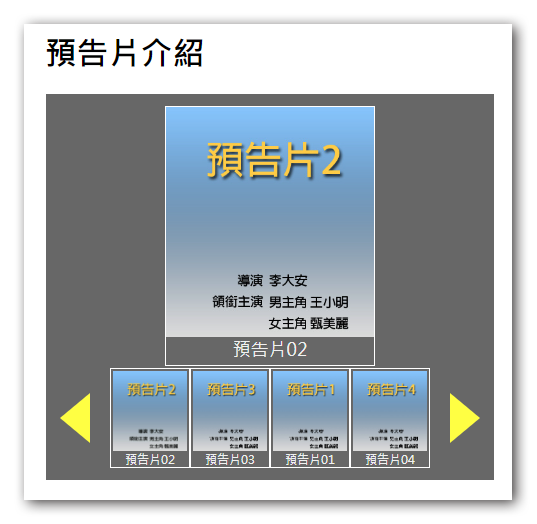
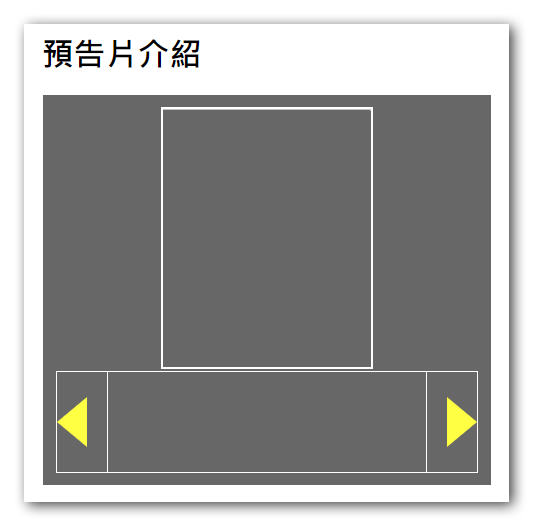
建置預告片展示區的版面規劃
依據題意,我們將畫面分成上下兩塊,依照原版的尺寸下去做規劃,長寬可以先寫死沒關係
因為轉場動畫製作的需要,會有包覆多層div的狀況,主要是為了日後方便閱讀原始碼
善用class命名來為每個區塊做簡單的命名,方便jQuery的操作
/front/main.php1
2
3
4
5
6
7
8
9
10
11
12
13
14
15
16
17
18
19
20
21
22
23
24
25
26
27
28
29
30
31
32
33<div class="half" style="vertical-align:top;">
<h1>預告片介紹</h1>
<div class="rb tab" style="width:95%;">
<!--海報區-->
<div class="lists">
<!--單一海報區塊-->
<div class="item">
<!--海報圖片-->
<div><img src="./img/>" alt=""></div>
<!--預告片名稱-->
<div></div>
</div>
</div>
<!--按鈕區-->
<div class="controls">
<!--向左按鈕-->
<div class="left"></div>
<!--海報按鈕區塊-->
<div class="btns">
<!--單一按鈕-->
<div class="btn">
<!--按鈕圖片-->
<div><img src="./img/"></div>
<!--預告片名-->
<div></div>
</div>
</div>
<!--向右按鈕-->
<div class="right"></div>
</div>
</div>
</div>為每個class名加上css,適度美化,由於題組未要求RWD,加上版面寬度被要求在1024px,因此區塊的大小可以寫死沒關係。
/view/front/main.php1
2
3
4
5
6
7
8
9
10
11
12
13
14
15
16
17
18
19
20
21
22
23
24
25
26
27
28
29
30
31
32
33
34
35
36
37
38
39
40
41
42
43
44
45
46
47
48
49
50
51
52
53
54
55
56
57
58
59
60
61
62
63
64
65
66
67
68
69
70
71
72
73
74
75
76
77<style>
.lists{
/*設定定位方式為相對定位 */
position: relative;
left:114px;
width:200px;
height:240px;
/*設定overflow不出現滾軸*/
overflow: hidden;
}
.item *{
box-sizing: border-box;
}
.item{
width:200px;
height:240px;
margin:auto;
box-sizing: border-box;
/* 先預設所有的海報都不顯示,
* 之後我們透過js來控制海報的顯示狀態 */
display:none;
position: absolute;
}
.item div img{
width:100%;
height:220px;
}
.item div {
text-align: center;
}
/* 設定左右區塊的邊框厚度及色彩
* 用來製作CSS幾何圖形 */
.left,.right{
width:0;
border:20px solid black;
border-top-color:transparent;
border-bottom-color:transparent;
}
.left{
border-left-width: 0;
}
.right{
border-right-width: 0;
}
.btns{
width:360px;
height:100px;
/*使用flex讓按鈕可以橫向排列 */
display:flex;
/*使用overflow來隱藏滾軸 */
overflow: hidden;
}
.btn img{
width:60px;
height:80px;
}
.btn {
font-size:12px;
text-align: center;
width:90px;
/*flex-shrink:0 讓元在flex排列下保有自己的寬度不會被擠壓 */
flex-shrink:0;
/*設定定位方式為相對定位,讓元件具有坐標,js才能控制移動*/
position: relative;
}
.controls{
width:420px;
height:100px;
position: relative;
margin-top:10px;
display:flex;
align-items: center;
justify-content: space-between;
}
</style>
取出預告片資料並帶入版面
- 將讀出的資料以迴圈的方式置入對應的海報區及按鈕區
/view/front/main.php1
2
3
4
5
6
7
8
9
10
11
12
13
14
15
16
17
18
19
20
21
22
23
24
25
26
27
28
29
30
31
32
33
34
35
36
37
38
39
40
41
42
43
44
45
46
47<div class="half" style="vertical-align:top;">
<h1>預告片介紹</h1>
<div class="rb tab" style="width:95%;">
<!--海報區-->
<div class="lists">
<?php
//取出所有設定為顯示的資料,並排序資料,
$posters=$Poster->all(['sh'=>1]," order by rank");
foreach($posters as $idx => $poster){
<!--單一海報區塊-->
<div class="item" data-ani="<?=$poster['ani'];?>">
<!--海報圖片-->
<div><img src="./img/<?=$poster['img'];?>" alt=""></div>
<!--預告片名稱-->
<div><?=$poster['name'];?></div>
</div>
<?php
}
?>
</div>
<!--按鈕區-->
<div class="controls">
<!--向左按鈕-->
<div class="left"></div>
<!--海報按鈕區塊-->
<div class="btns">
<?php
foreach($posters as $idx =>$poster ){
<!--單一按鈕-->
<div class="btn">
<!--按鈕圖片-->
<div><img src="./img/<?=$poster['img'];?>"></div>
<!--預告片名-->
<div><?=$poster['name'];?></div>
</div>
<?php
}
?>
</div>
<!--向右按鈕-->
<div class="right"></div>
</div>
</div>
</div>